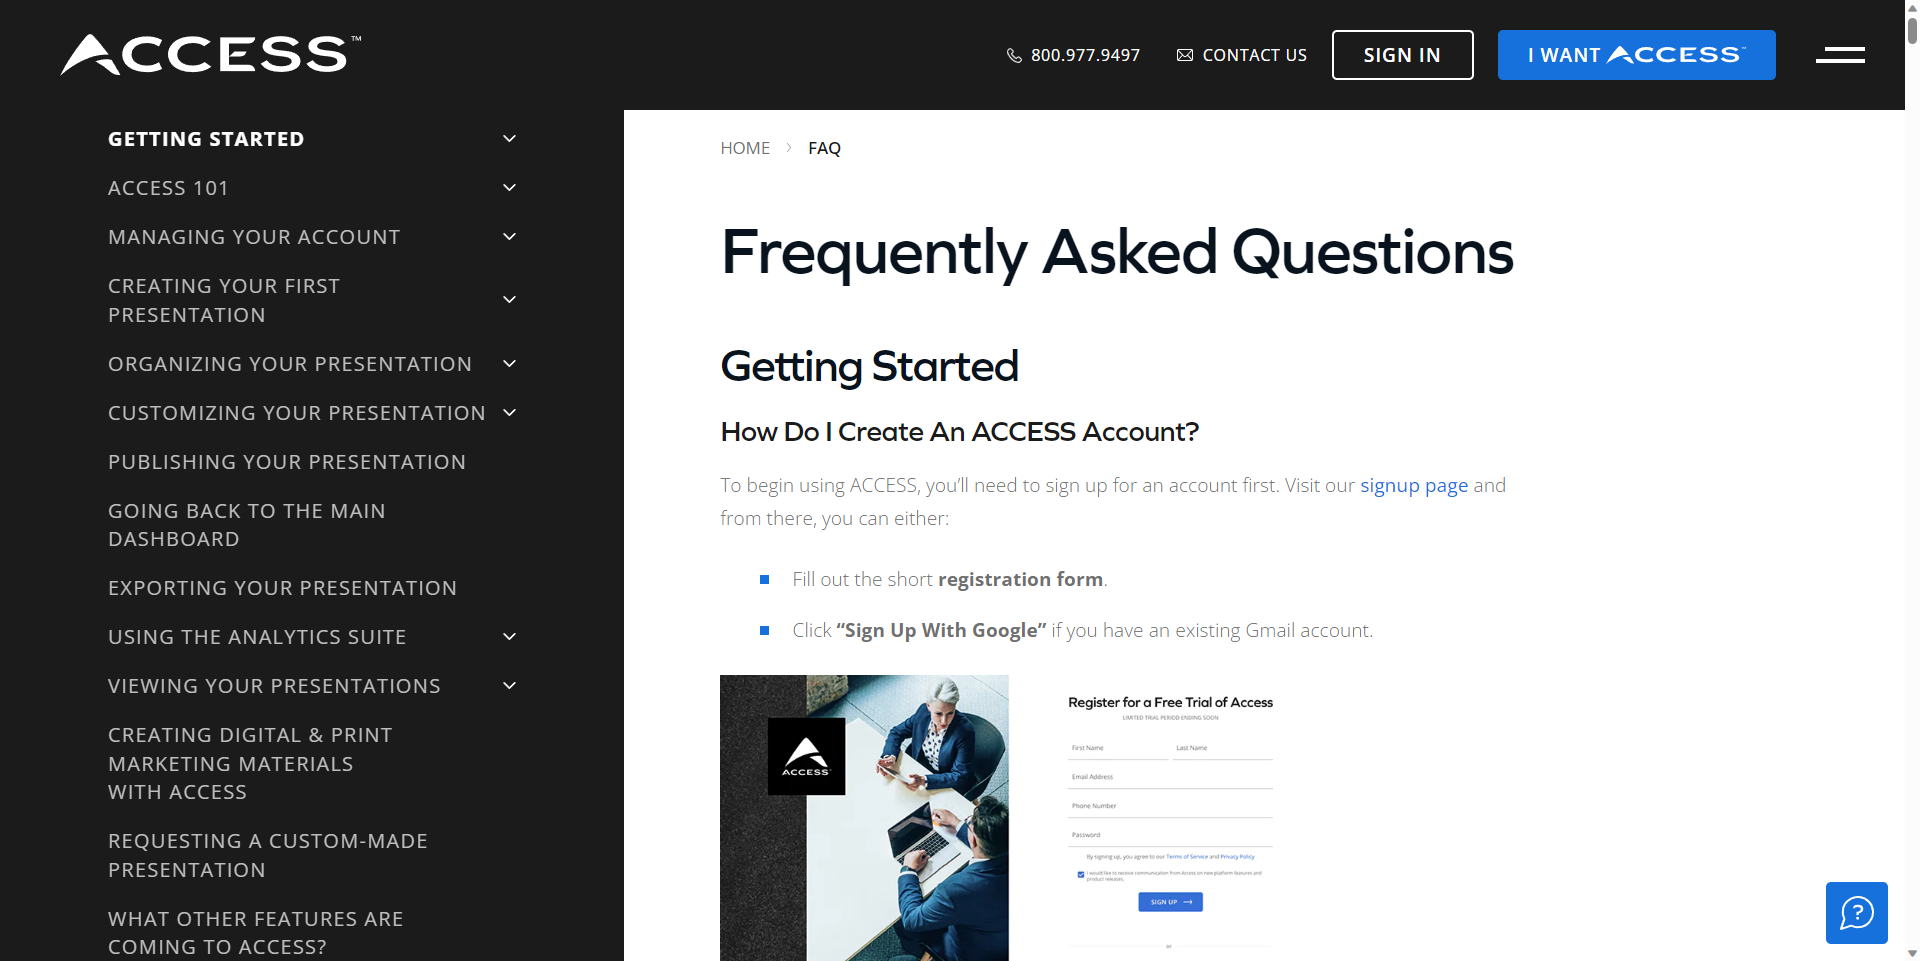
Features
Here are the additional features available for app.access.com
Quick Guide
The Quick Guide feature provides a step-by-step guide on how to create presentations.
The quick guide can be initiated by clicking the Help (?) button and clicking on the Quick Guide button.

- Create Presentation
- Choose between a Digital Listing Presentation or a Digital Open House.

- Select Template
- Choose between the different styles of templates.

- Welcome to The Editor
- This is where you can edit details, add pages or sections, and publish your presentation.

- Edit Details
- Add titles, descriptions, images, and videos of the property you’re promoting.

- Manage Pages and Sections
- Add, organize, rename, or remove pages & sections.

- Publish Presentation
- Publish your presentation to generate a link that you can share with others.

- Quick Guide End
- You can always find the Quick Guide by clicking on the
Help (?)icon.
- You can always find the Quick Guide by clicking on the

Get Inspired
The Get Inspired feature lets you view existing presentation template designs and use them as inspiration that complements your brand in creating your own presentations.
On the dashboard, click on the Get Inspired button.

You will be redirected to the Get Inspired page where you can view the sample presentations.

Select a presentation to preview its contents.

If you wish to view the template used in the presentation, click on the View This Template button.

You will be redirected to the Templates page with a modal of the template you wish to view.

After selecting a color theme for your presentation, click on the Use This Template button to start creating the presentation.

You will then be redirected to the editor page to edit the contents of the template.

Hire an Access Expert
The Hire an Access Expert feature allows you to work with in-house designers to help you create your presentations.
On the dashboard, click on the Hire an Access Expert button.

After clicking the button, a modal will appear about Hiring an Access Expert for your presentation.

If you wish to proceed, click the Yes, Please button to continue.

You will then be prompted that a confirmation email is sent to you for your request.

Check your email for the confirmation message and wait for the response of the Access Support Team regarding your inquiry.

The Access support team will then receive an email regarding your request.

Help & Support
The Help & Support Feature redirects you to the Access FAQ page for your reference.
On the dashboard, click the Help (?) button.

Select Help & Support from the dropdown menu.

After clicking Help & Support, you will be redirected to the FAQ page of access.com for your reference.
Feedback
The Feedback feature redirects you to the Access Feedback page.
On the dashboard, click the Help (?) button.

Select Feedback from the dropdown menu.

After clicking Feedback, you will be redirected to the Feedback page of access.com where you can answer and submit the form.

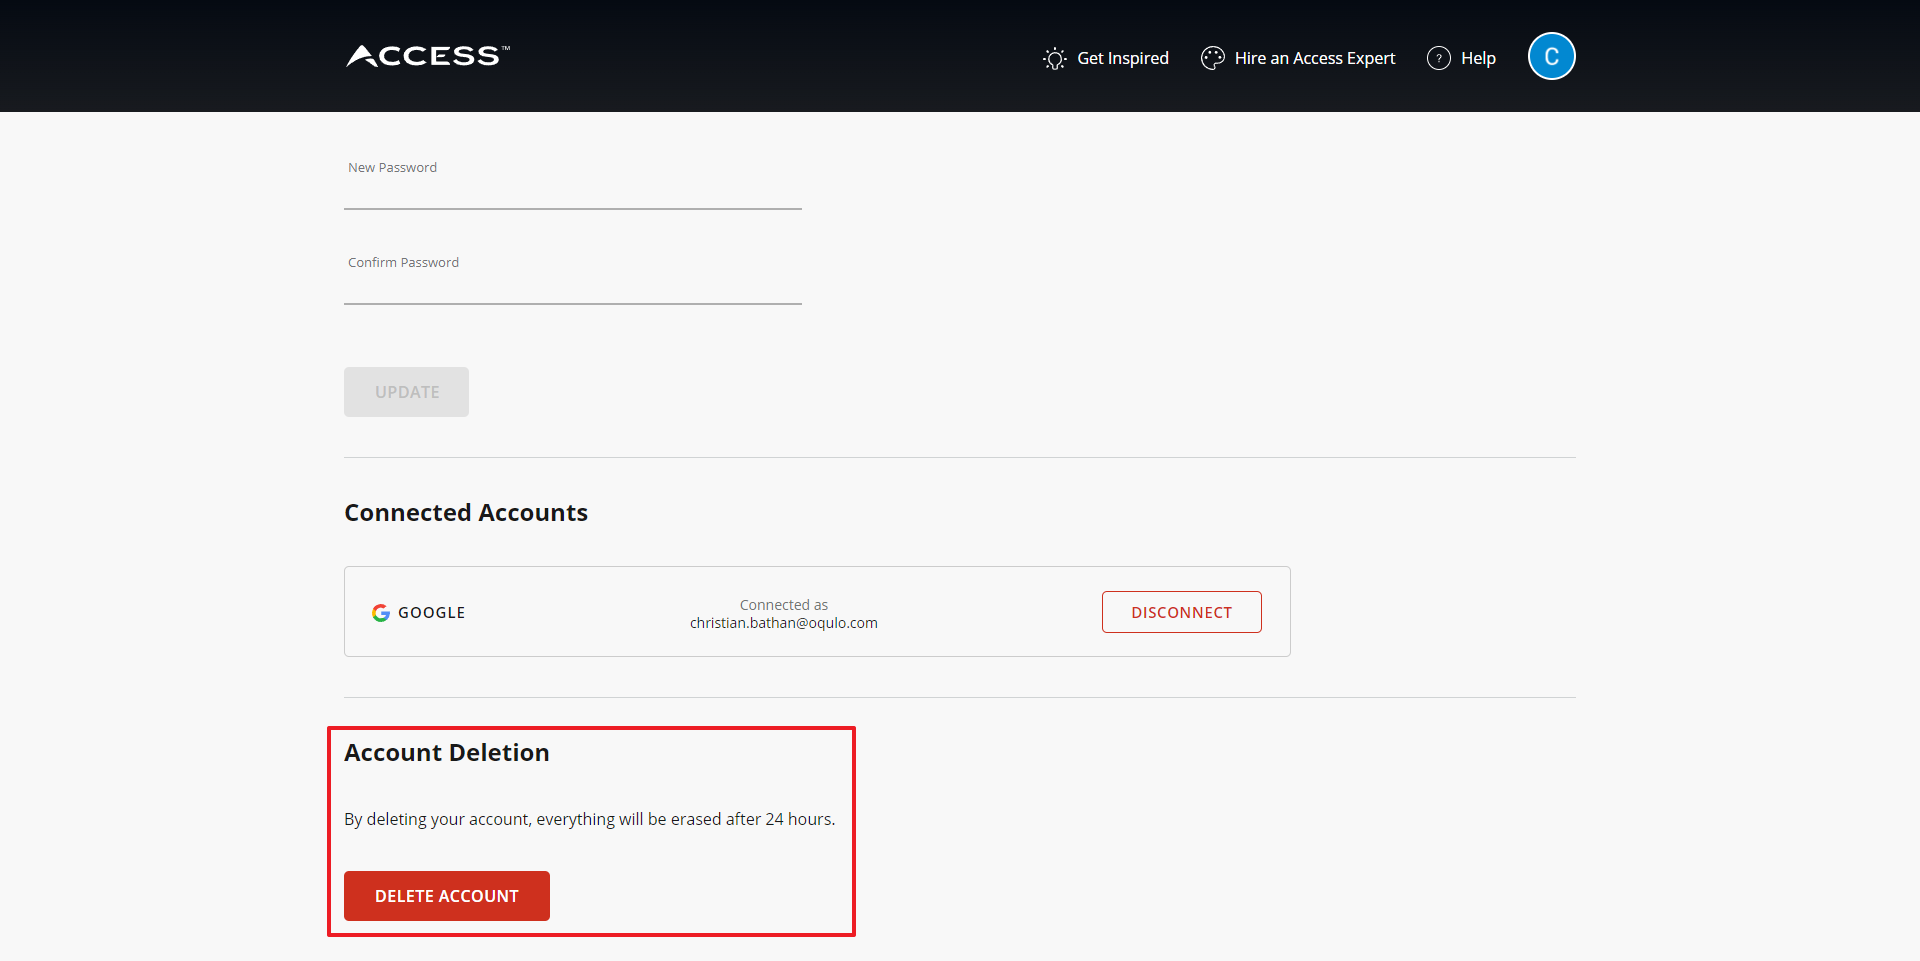
Profile
The Profile page lets you view and edit your personal account information.
On the dashboard, click on your profile picture icon.

Select Profile from the dropdown menu.

After clicking Profile, you will be redirected to the Profile page where you can:
- View and edit your account information

- Change your password

- Connect/disconnect your Google Account

- Delete your account
Autosave
The Autosave feature saves a change on the template under the editor page automatically, every few seconds, as you work.
When the AutoSaving is running, the Status message with Saving as draft should display, and the Publish button will be disabled.

After the changes were successfully made, the Status message will change to Last saved just now, and the Publish button will be enabled. This allows the user to publish the template and view the presentation.

Closing the editor view while the AutoSave feature is running will trigger a pop-up confirmation to verify that the user is about to leave the site and changes may not be saved.
